 this is what the sky looked like yesterday in the morning. apollo was not being a cooperative fellow ,to say the least. but by 10 it was sunny and the wind was blowing a gentle 25 miles per hour (or so it felt). regardless, we started our project. i'm an "instant gratification" kind of gal, and i'd been waiting weeks to cash in on some of the hubby's time. i finally had him, and he wasn't gonna slither away...
we also recruited some strong young fellas to do the grunt work (seen here spreading out the drainage rock over the weed barrier) unfortunately our older daughter got herself a case of the stomach ickies so she couldn't help, but she was bummed, being a real die-hard junior environmentalist-


these fir beams were salvaged from a house my husband's crew rebuilt (note to ladies: if you are a diy kind of gal, you can't do better than to snag yourself a carpenter/woodworker in the way of freebie slave labor and materials. just a thought...) and we cut them to size (about 71/2 ft) and leveled them, and braced them, and did it again when they blew down (almost severing said carpenter's foot) 


we then notched the tops of the posts in order to fit the top frame into place (yes, that is my youngest son, he's been chopping dovetails that would make bob vila jealous since he was about 3)


we re-set the posts and fit the top frame and cross-braces (notice: you must be wearing just a carpenter's vest contraption, have tattoos, and flexy muscles to perform this task)

then 2 more beams to span the top and set the watering can between (screws in the handle

barrel went up and was strapped w/ ties (winds were gale-force by this time)
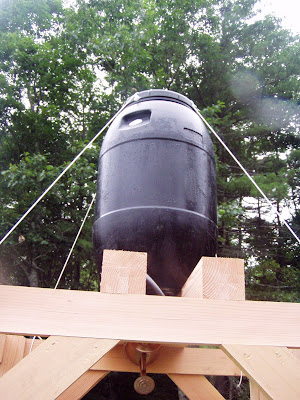 and the "plumbing" was installed ( black short length of hose from barrel spigot , on/off tap between, and then into watering can)
 the effect is sooooo cool! it's still not quite done- needs siding (insert neighbor's sigh of relief here), a pallet/ platform floor, and of course, a linen curtain (which you can find in my shop, too, excuse the shameless plug!) i'm sure finished product pics are to come...
the day looks like this today(look familiar?)
 so action shower-shots are not in the forecast... but rain is!
4 comments:
That watering can is sooo cute. What an awesome idea! I love your blog can you tell.
A small children are learning a great time of Outdoor shower build up. Sounds great for that. Happy to see the construct.
That is really neat. I am wanting an outdoor shower. Thanks for the ideas
Post a Comment